August 26, 2017

Necchi BU Mira (1954)

I think I have had all of the 1950' series Necchi's at this point?
Miranda
Nora
Lydia
Nova
SuperNova
Logica 592 80s


This one cam out of a cabinet and needed both the full "all metal bits off" cleaning as well as new wiring from plug to pedal. Fortunately I had this handy BU wiring diagram to work to.


 Super saturated in 63 year old oil/grime it was a tough nut to crack.
Nice to have the original motor with the date and the hefty 1.1amp stamped on it.
Unfortunately this green paint job did not survive nearly as well as my grey Nora

She was frozen to the point of about a half turn only but the most fun is getting them unstuck. I made a custom crank handle out of a spare lock knob so that I can have better leverage while doing the loosening / break-in phase


No case on this one but it came with this unusual accessories box

The "Press Here" box


August 22, 2017

Bernina Virtuosa 150 QE

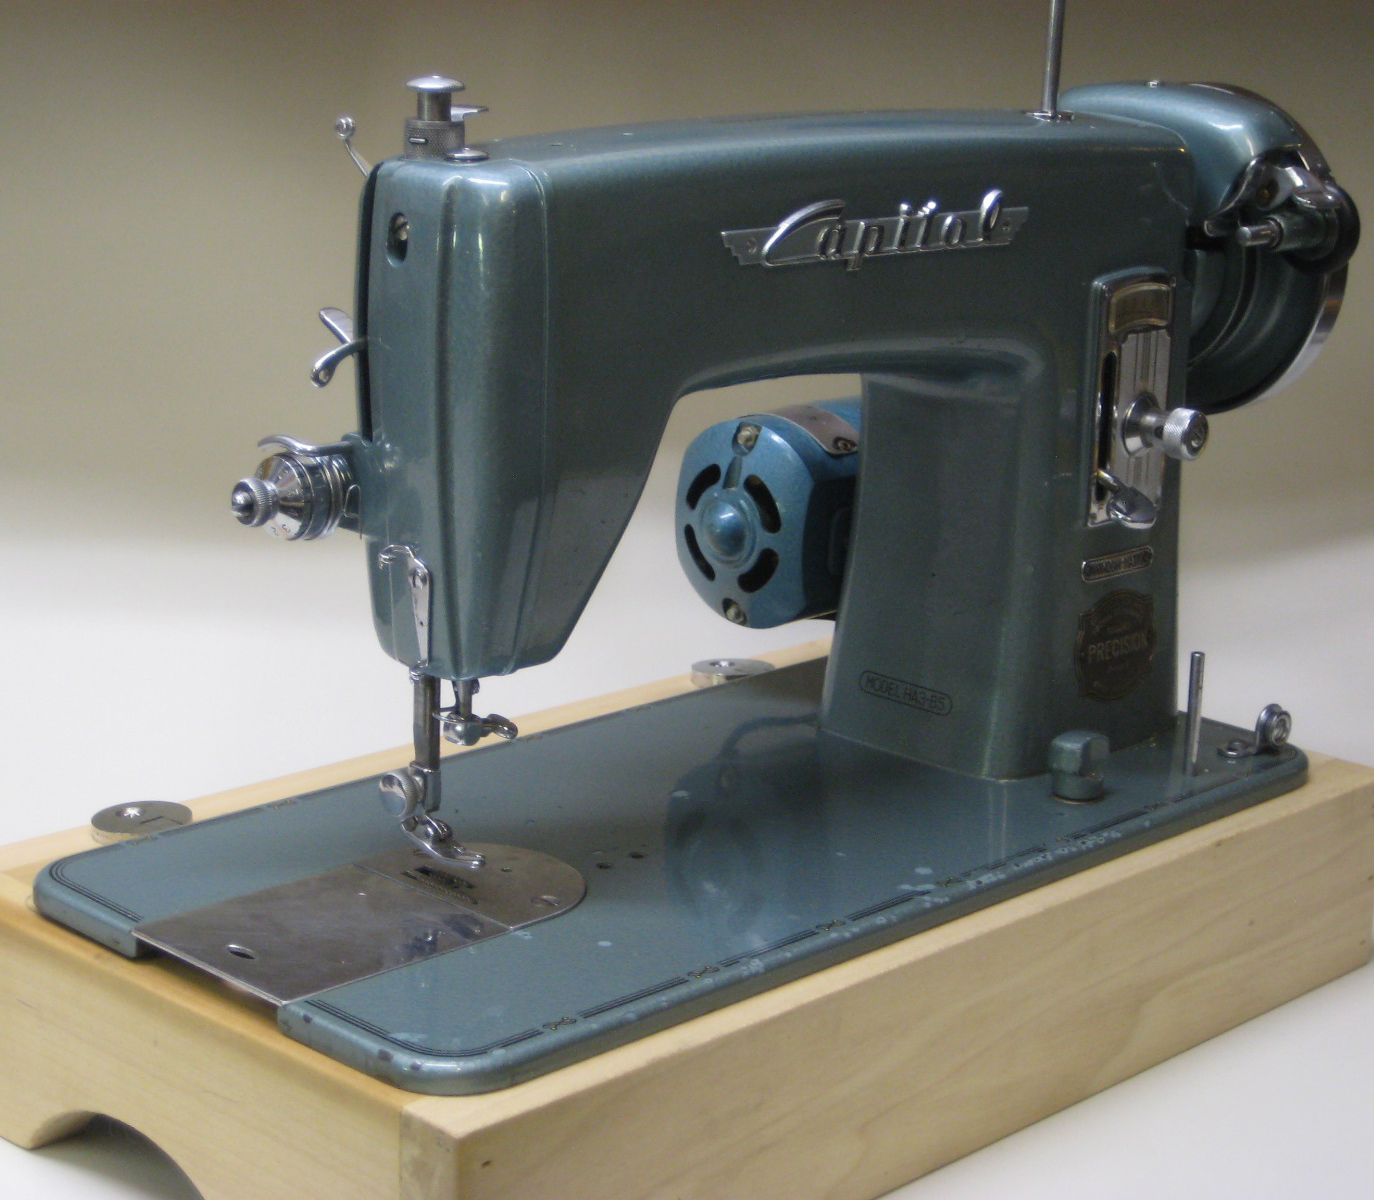
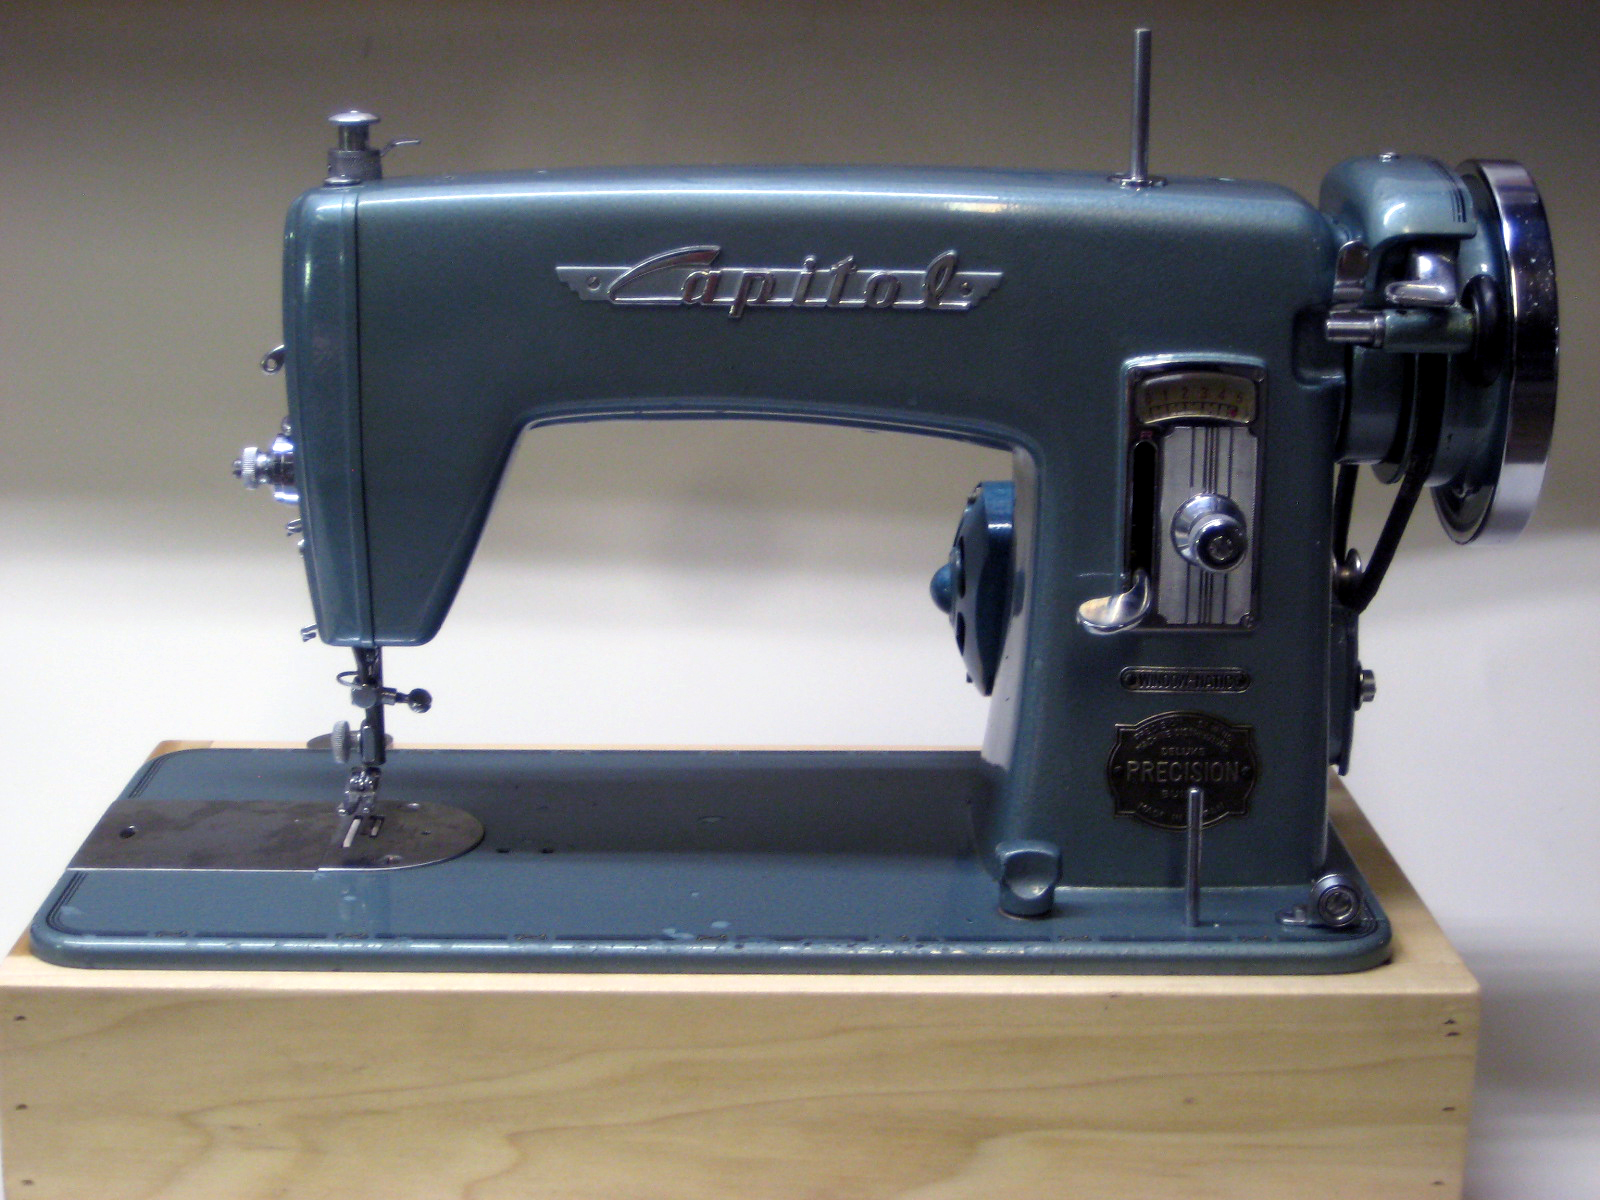
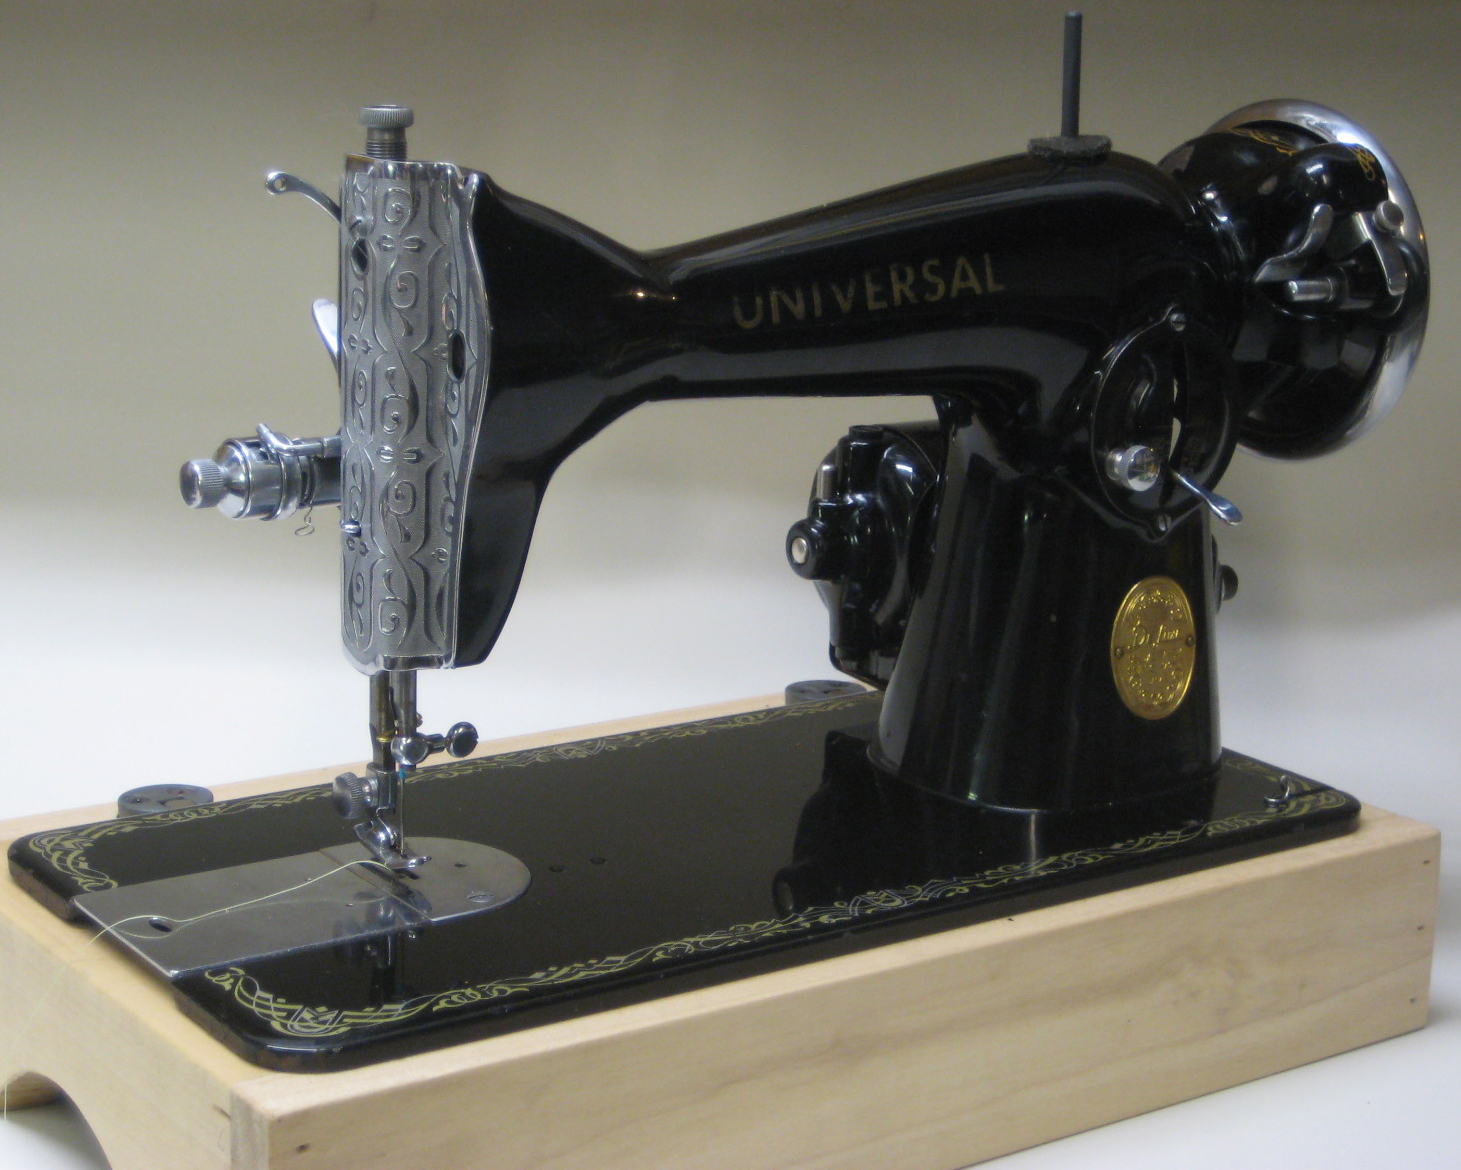
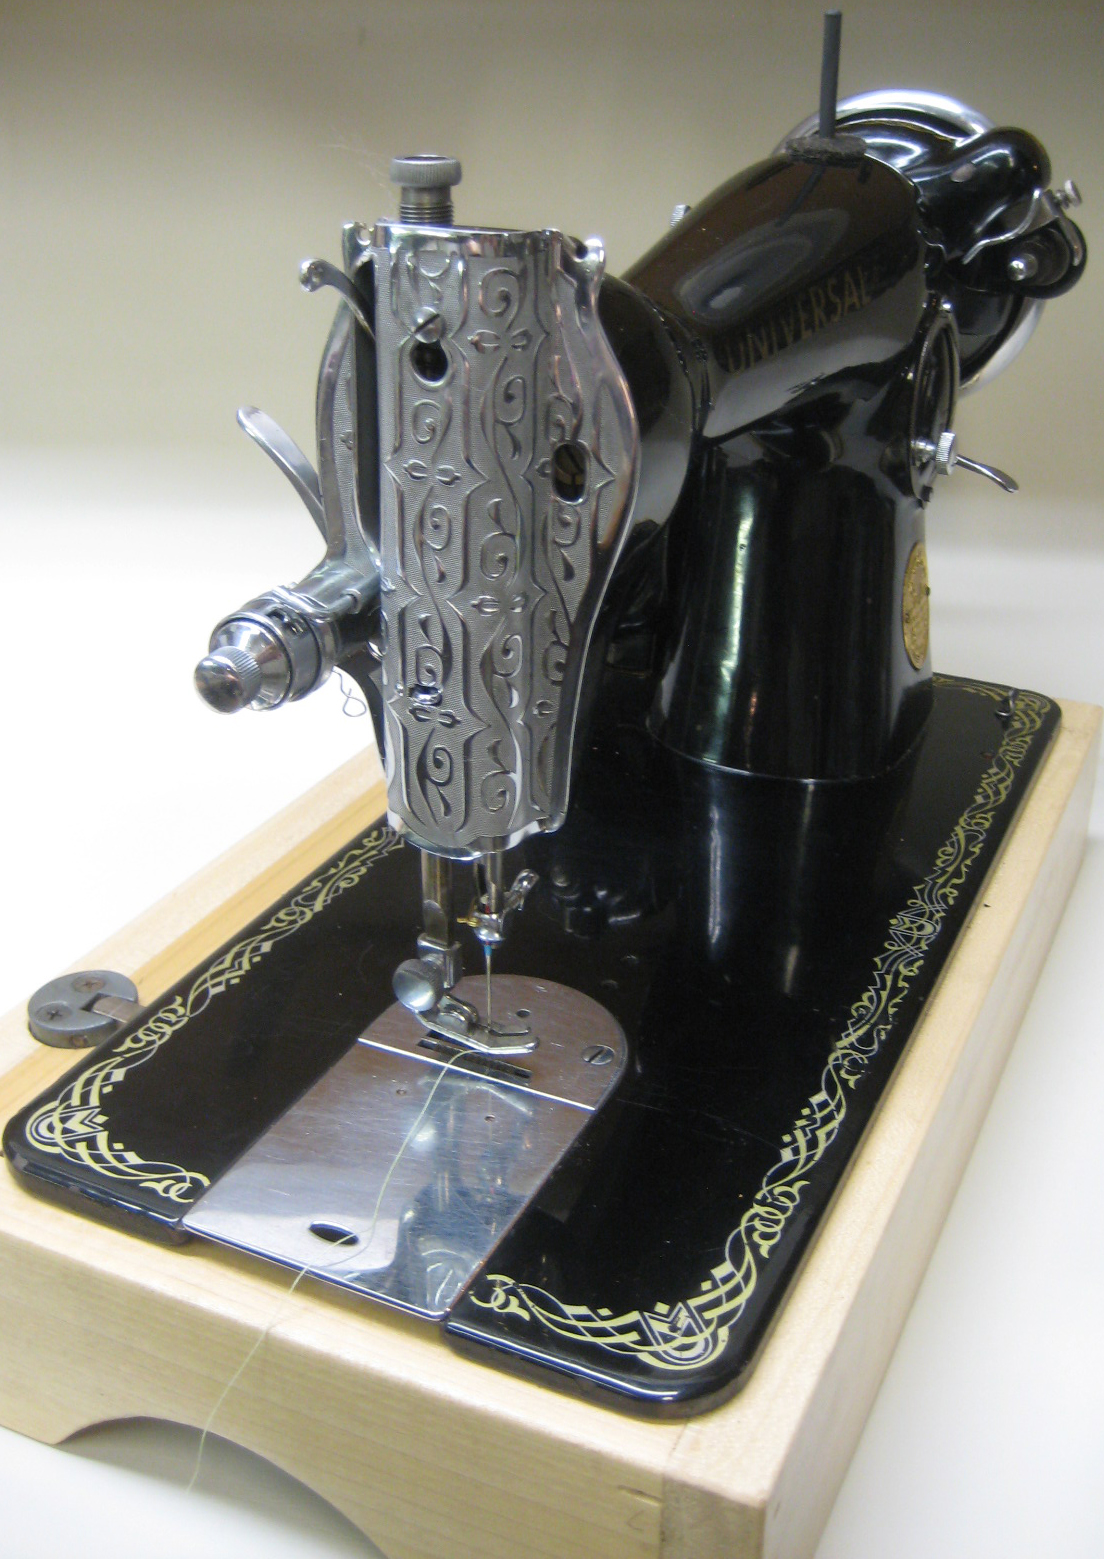
Found this little gem at an Estate sale up north while staying at Crystal lake
Again I have become very interested in the early and 2nd generation computerized machines, with my background in CNC machining I have an affinity towards motor controllers and believe that the over concern regarding a computer board failure is just that.

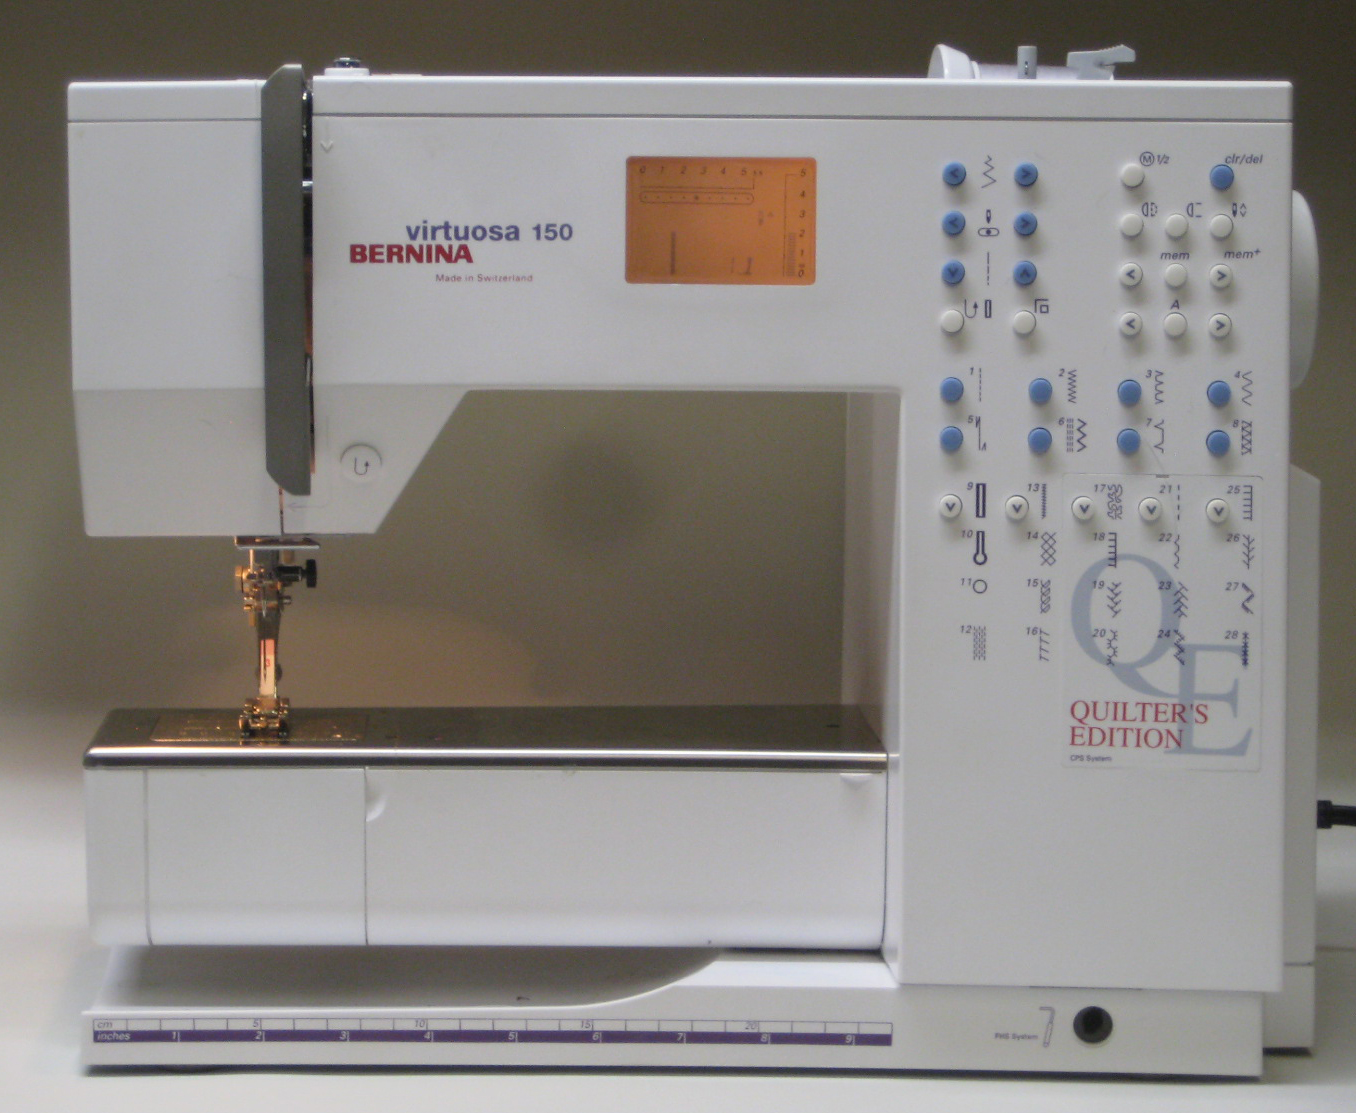
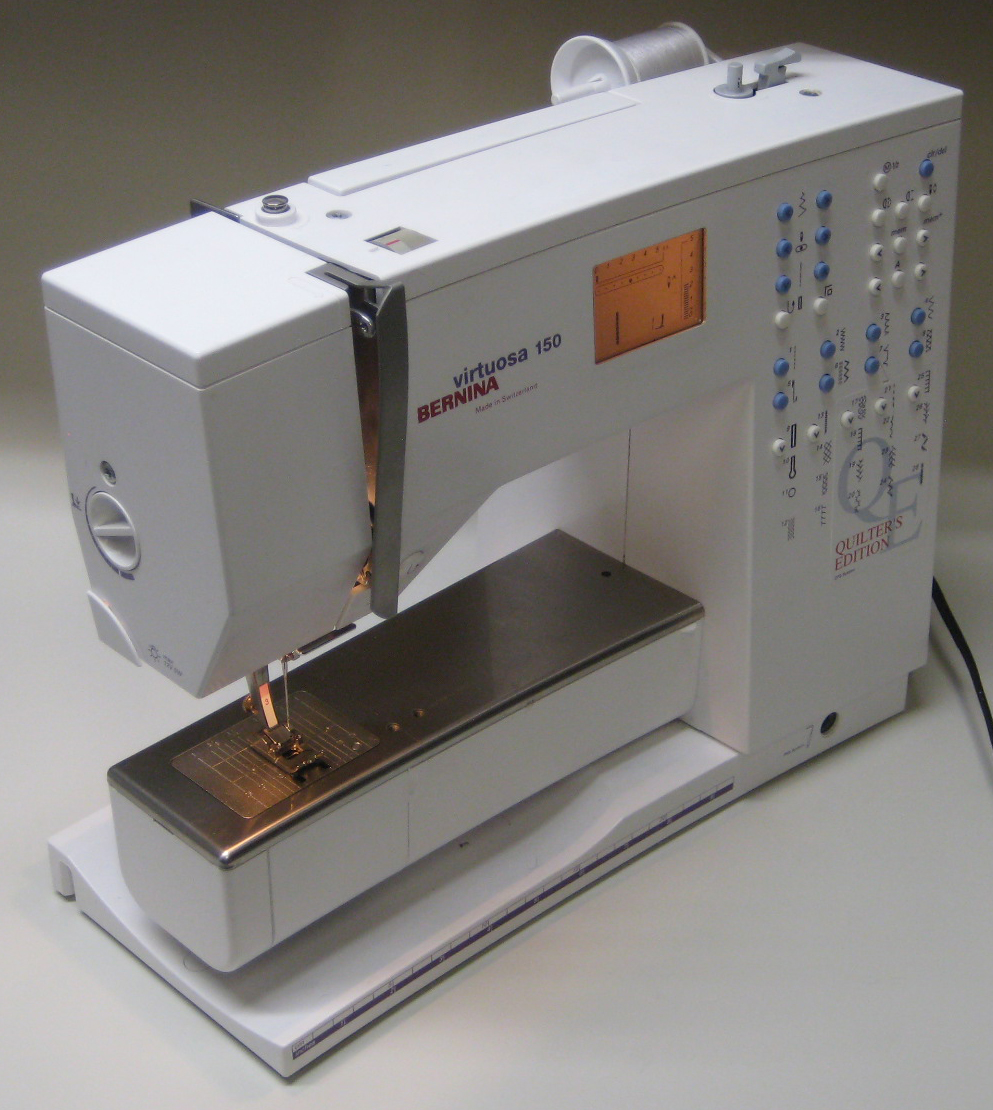
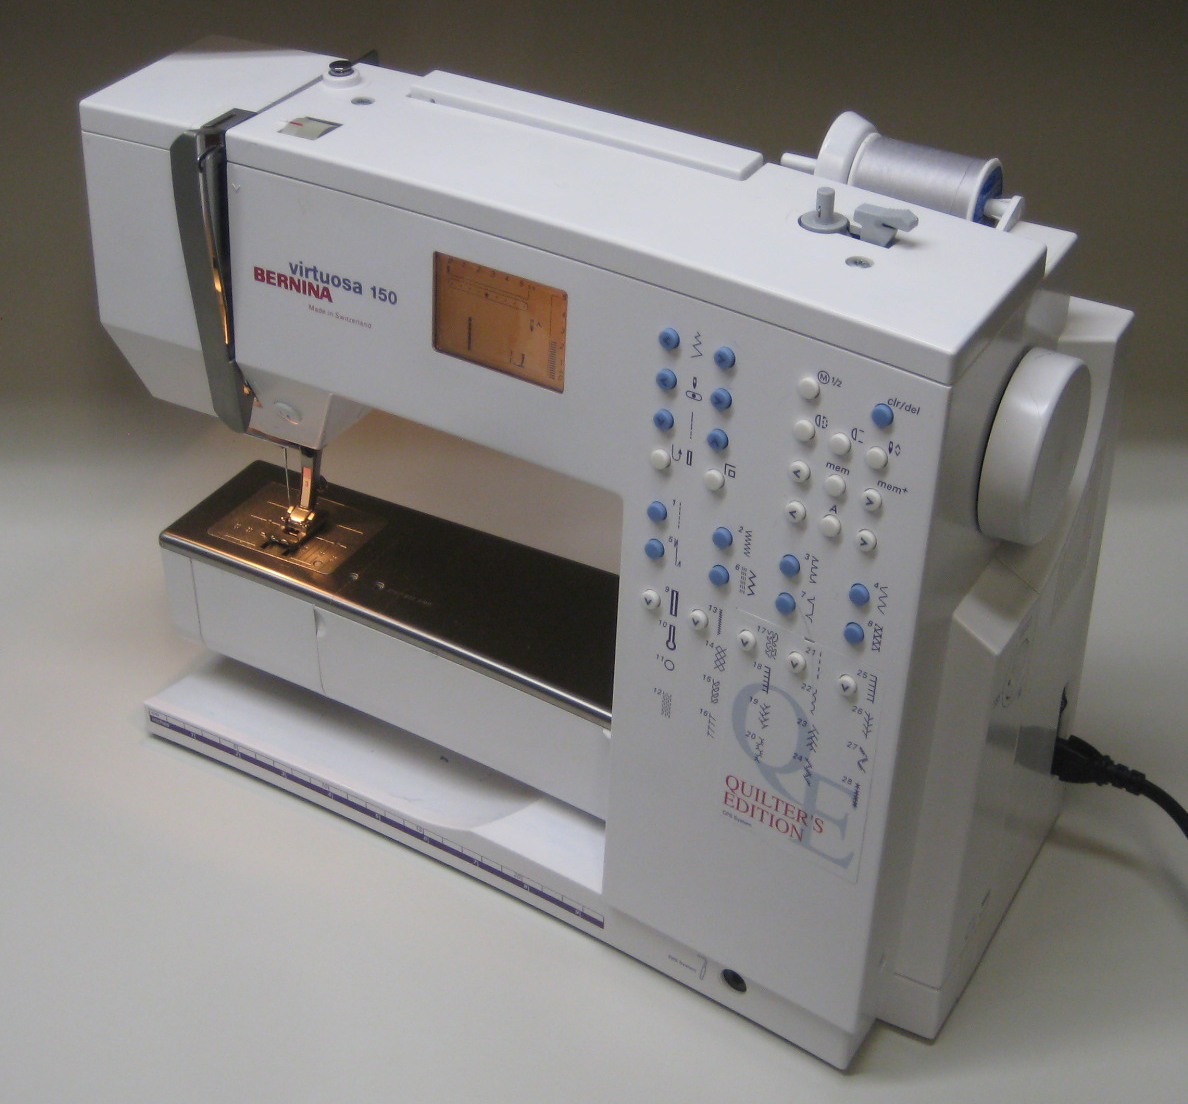
I think the Virtuosa is a lesser and more rare version of the Artista, but it is still a Bernina

A handsome machine, classic late 90's
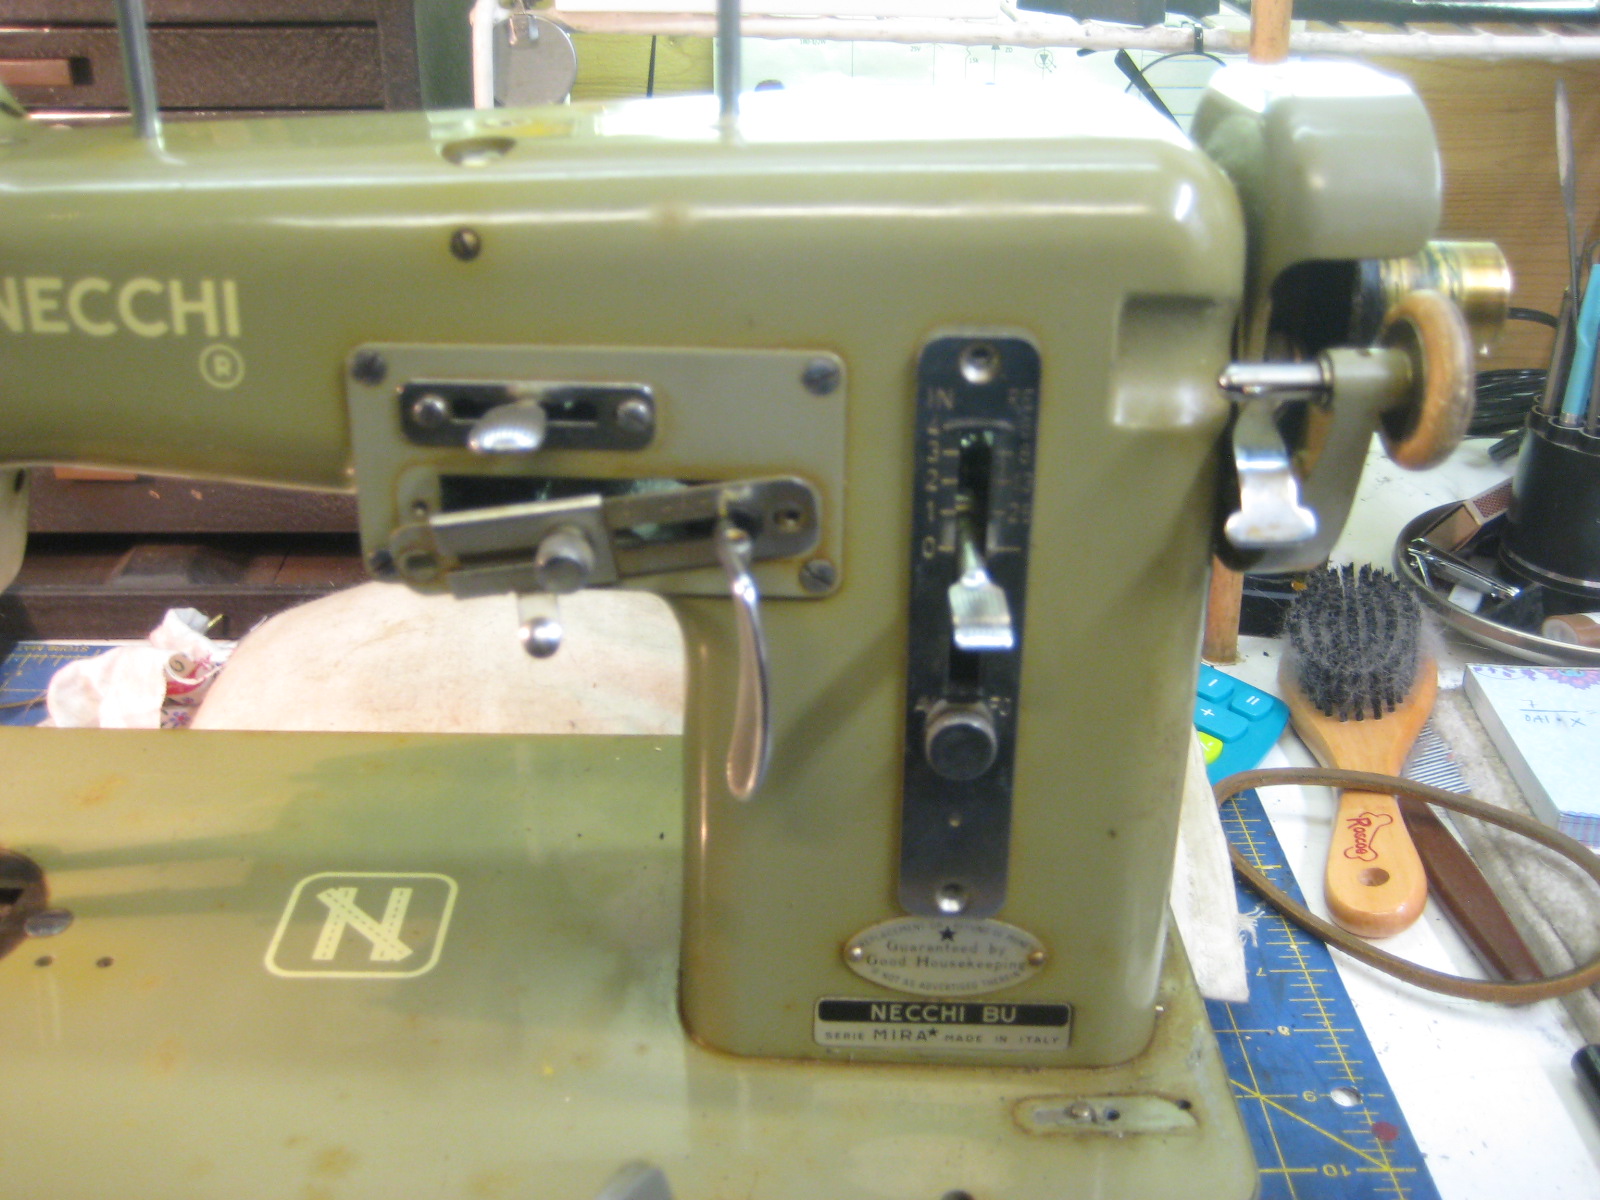
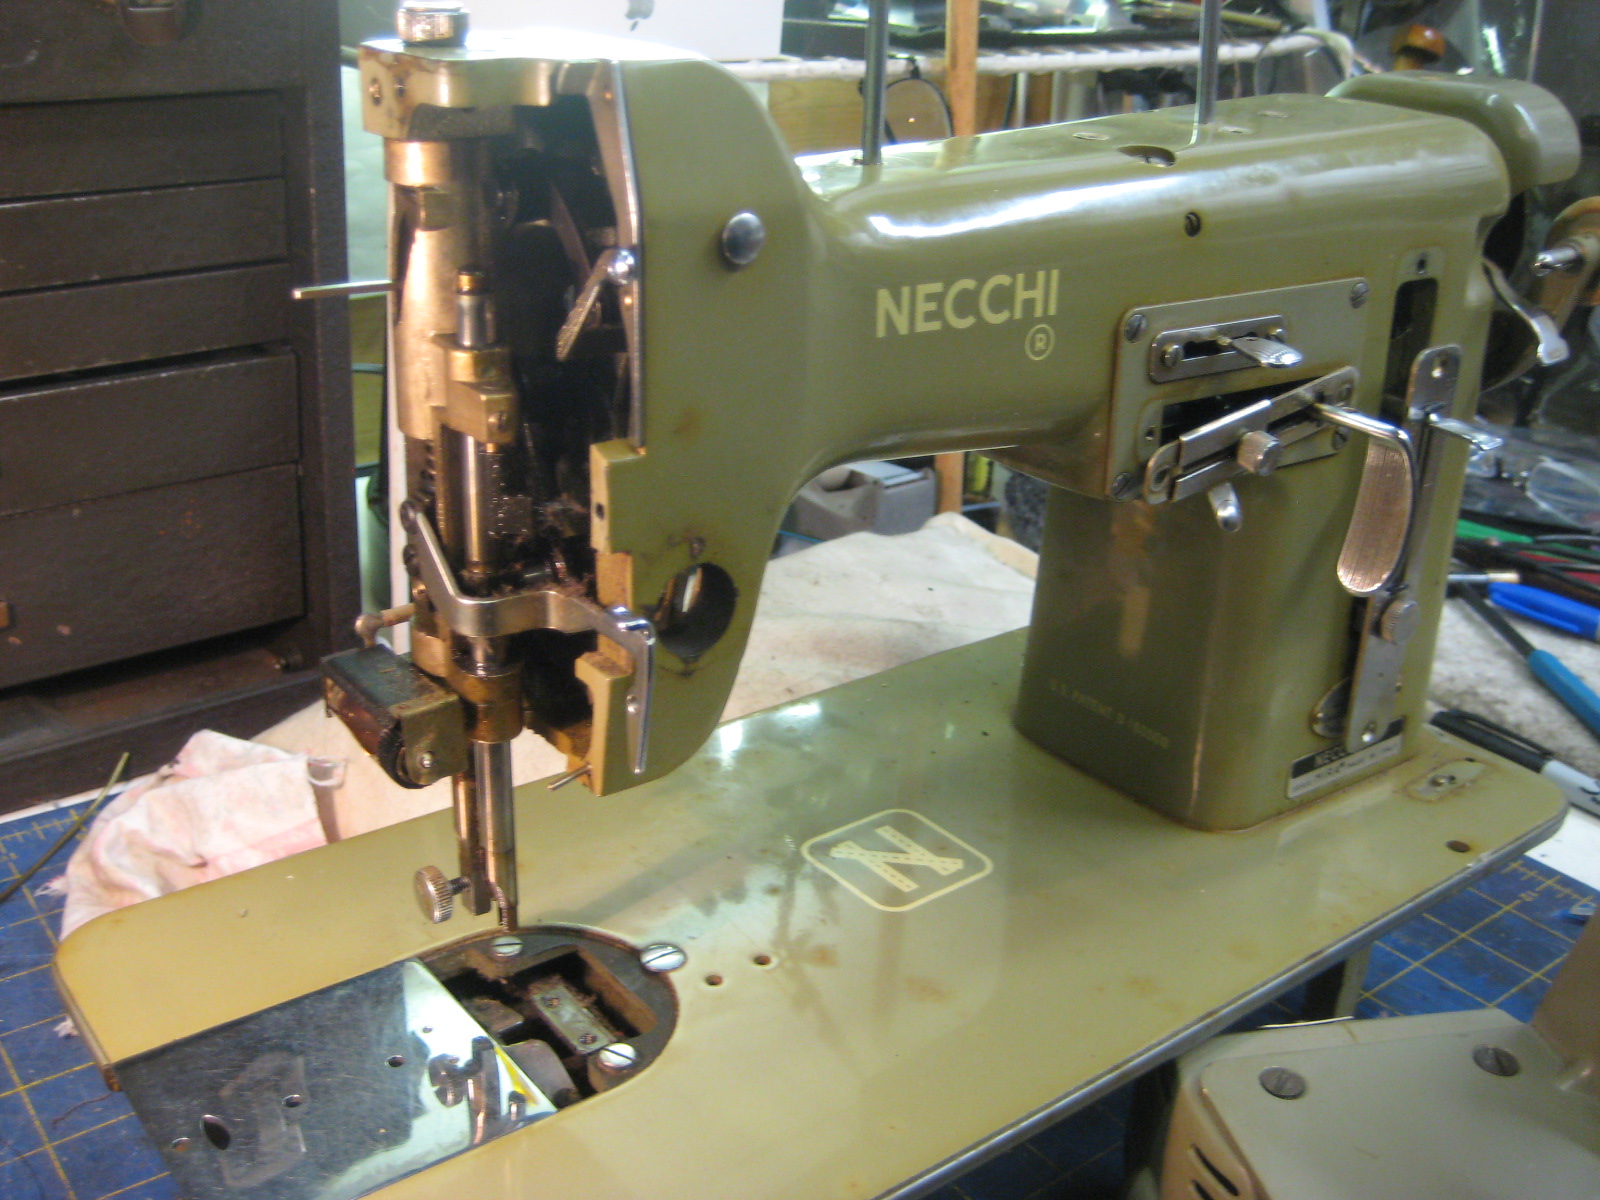
During clean up I found  thread wrapped around the counter weight crank and all the joints involved with the take-up lever, that was a new one!
Got the knee lift working with a DIY steel rod it makes such a difference in operation, did a small upholstery leather project very well

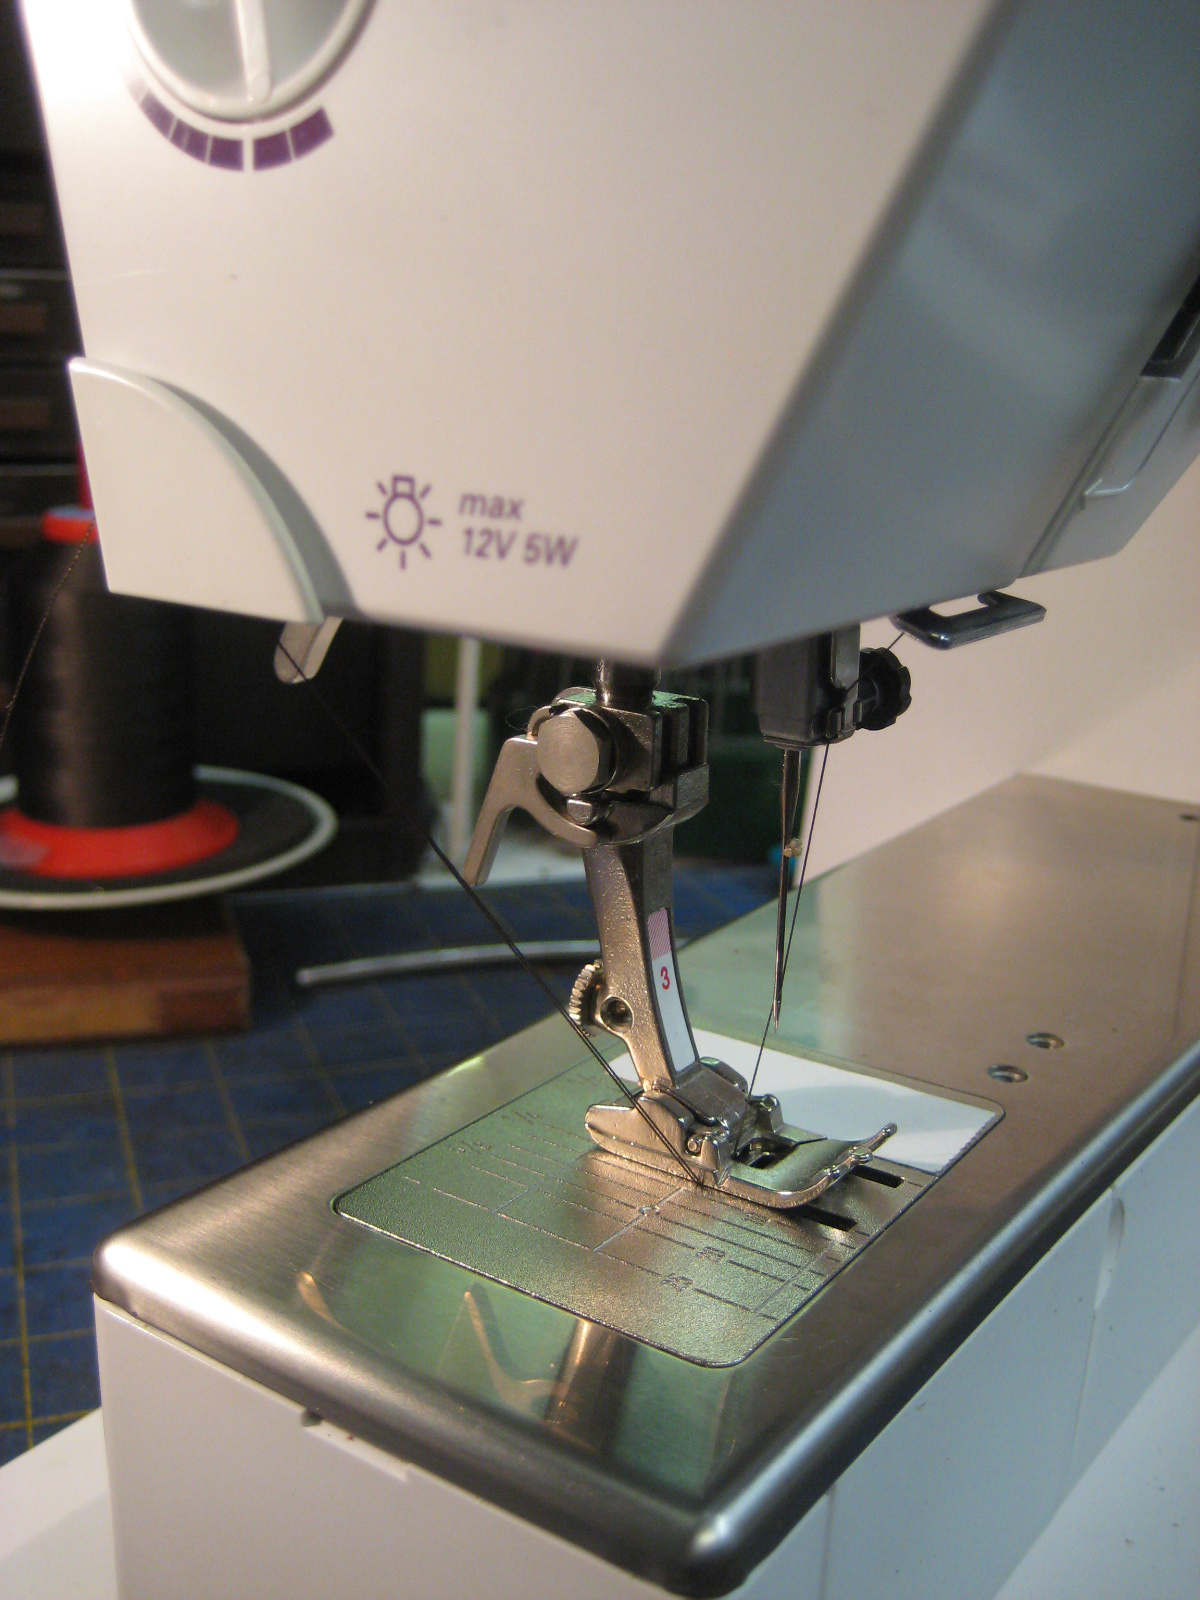
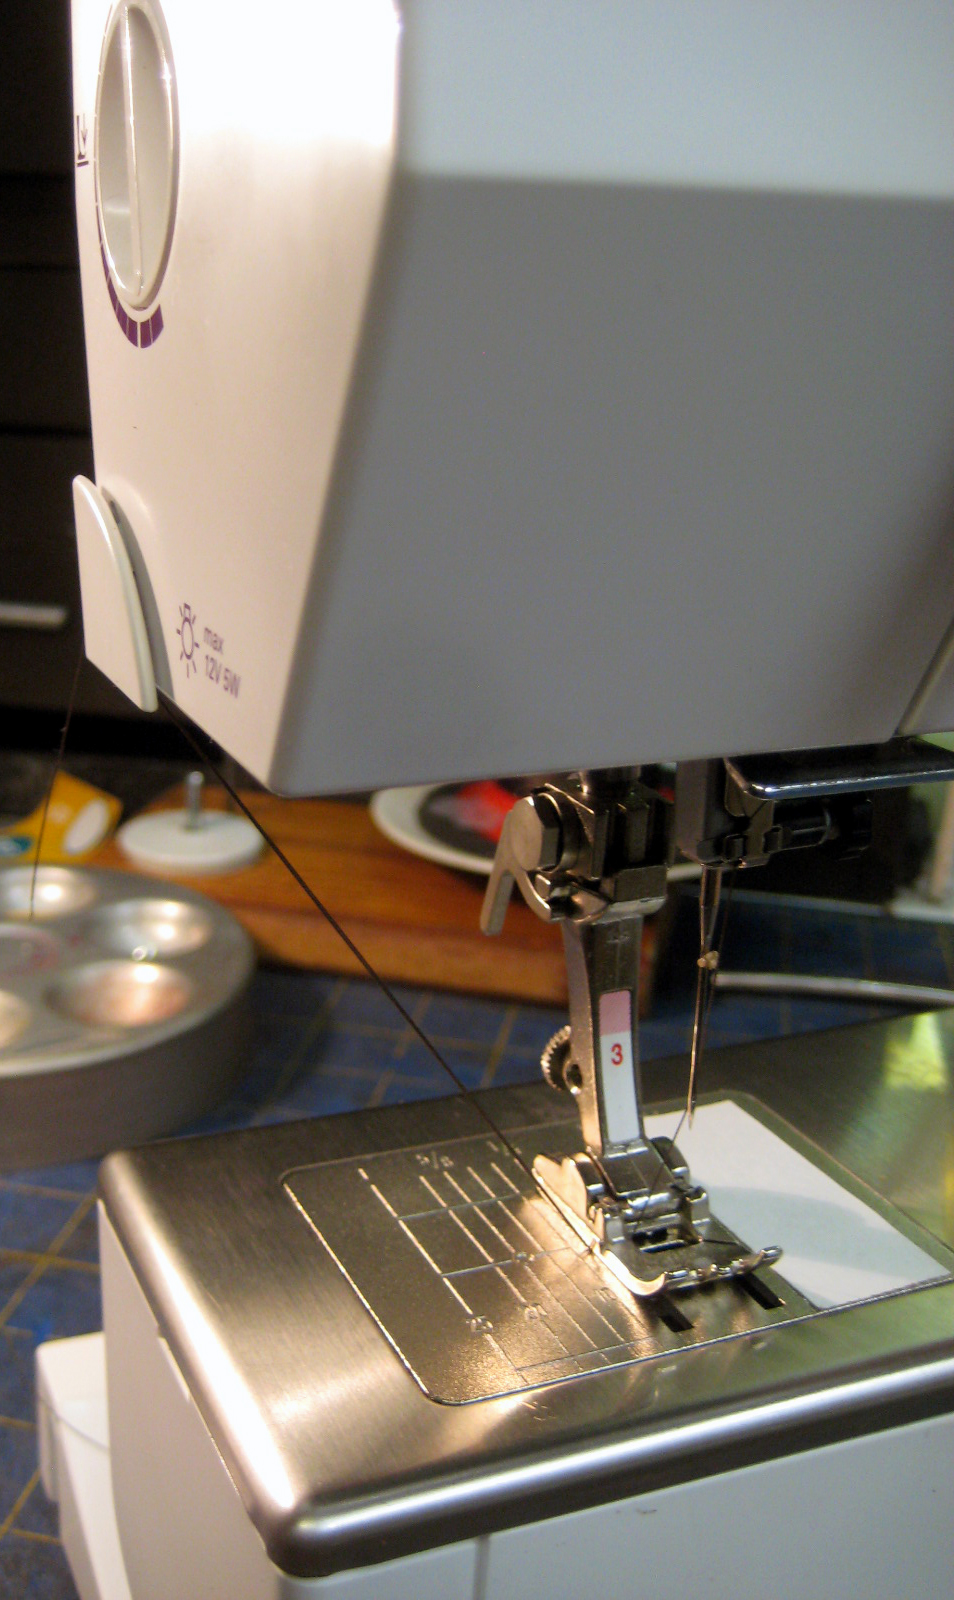
Another endearing feature, if they even intended it is the thread cut-off on the left side of the machine. About 90% of the time the cut-off  holds both ends of the threads up in place, this is really nice because you know where both threads are and starting the next stitch line is like having someone holding the threads up for you


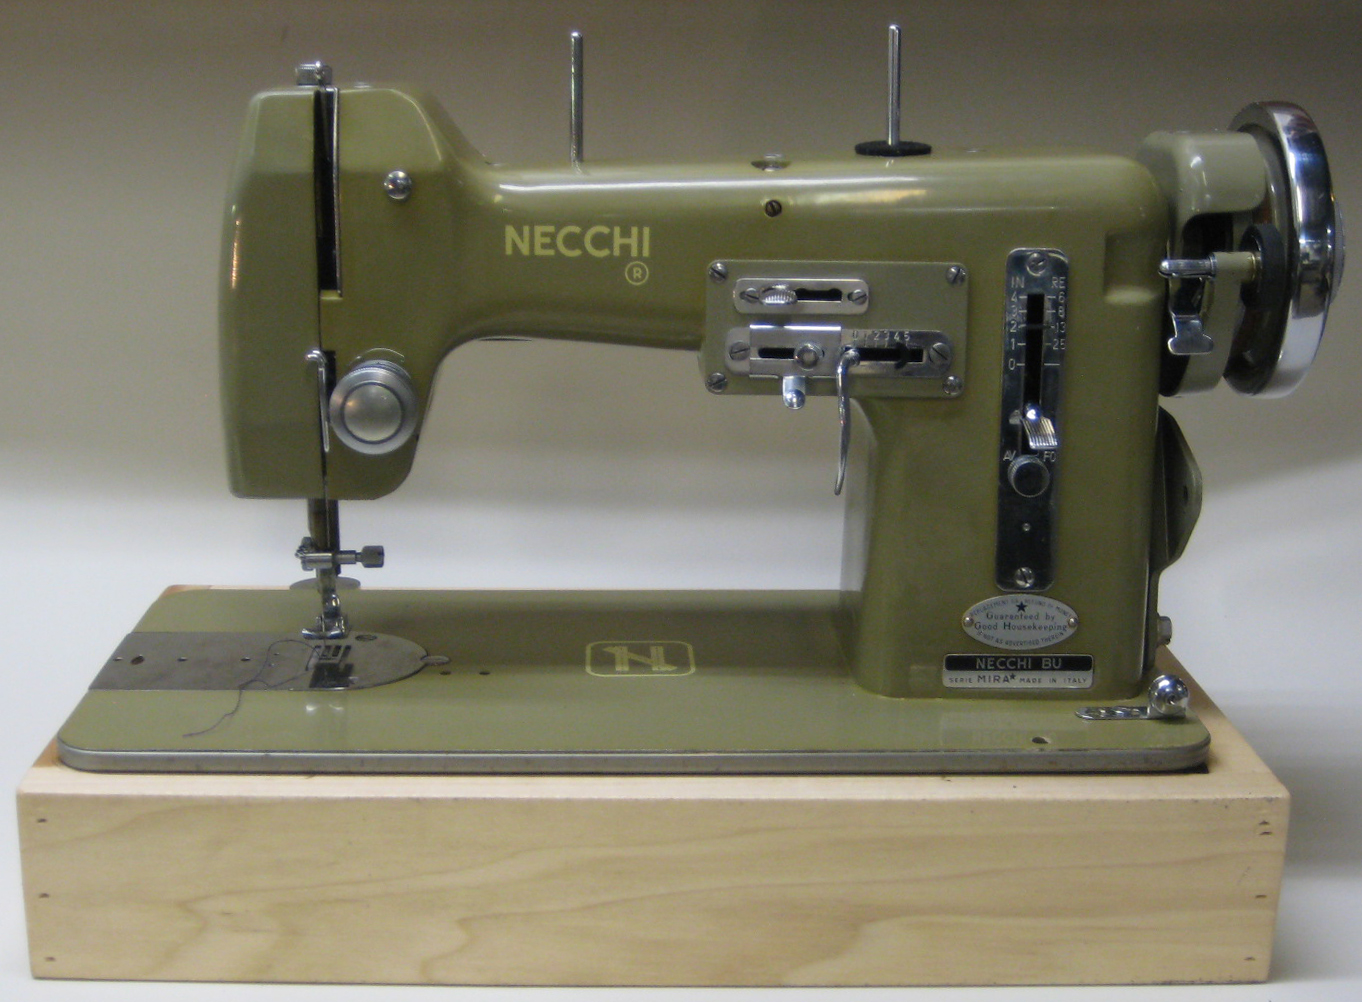
Made in Switzerland, that's all we care about!
It has a Stainless Steel free arm top cover; it will NEVER show signs of wear with that!
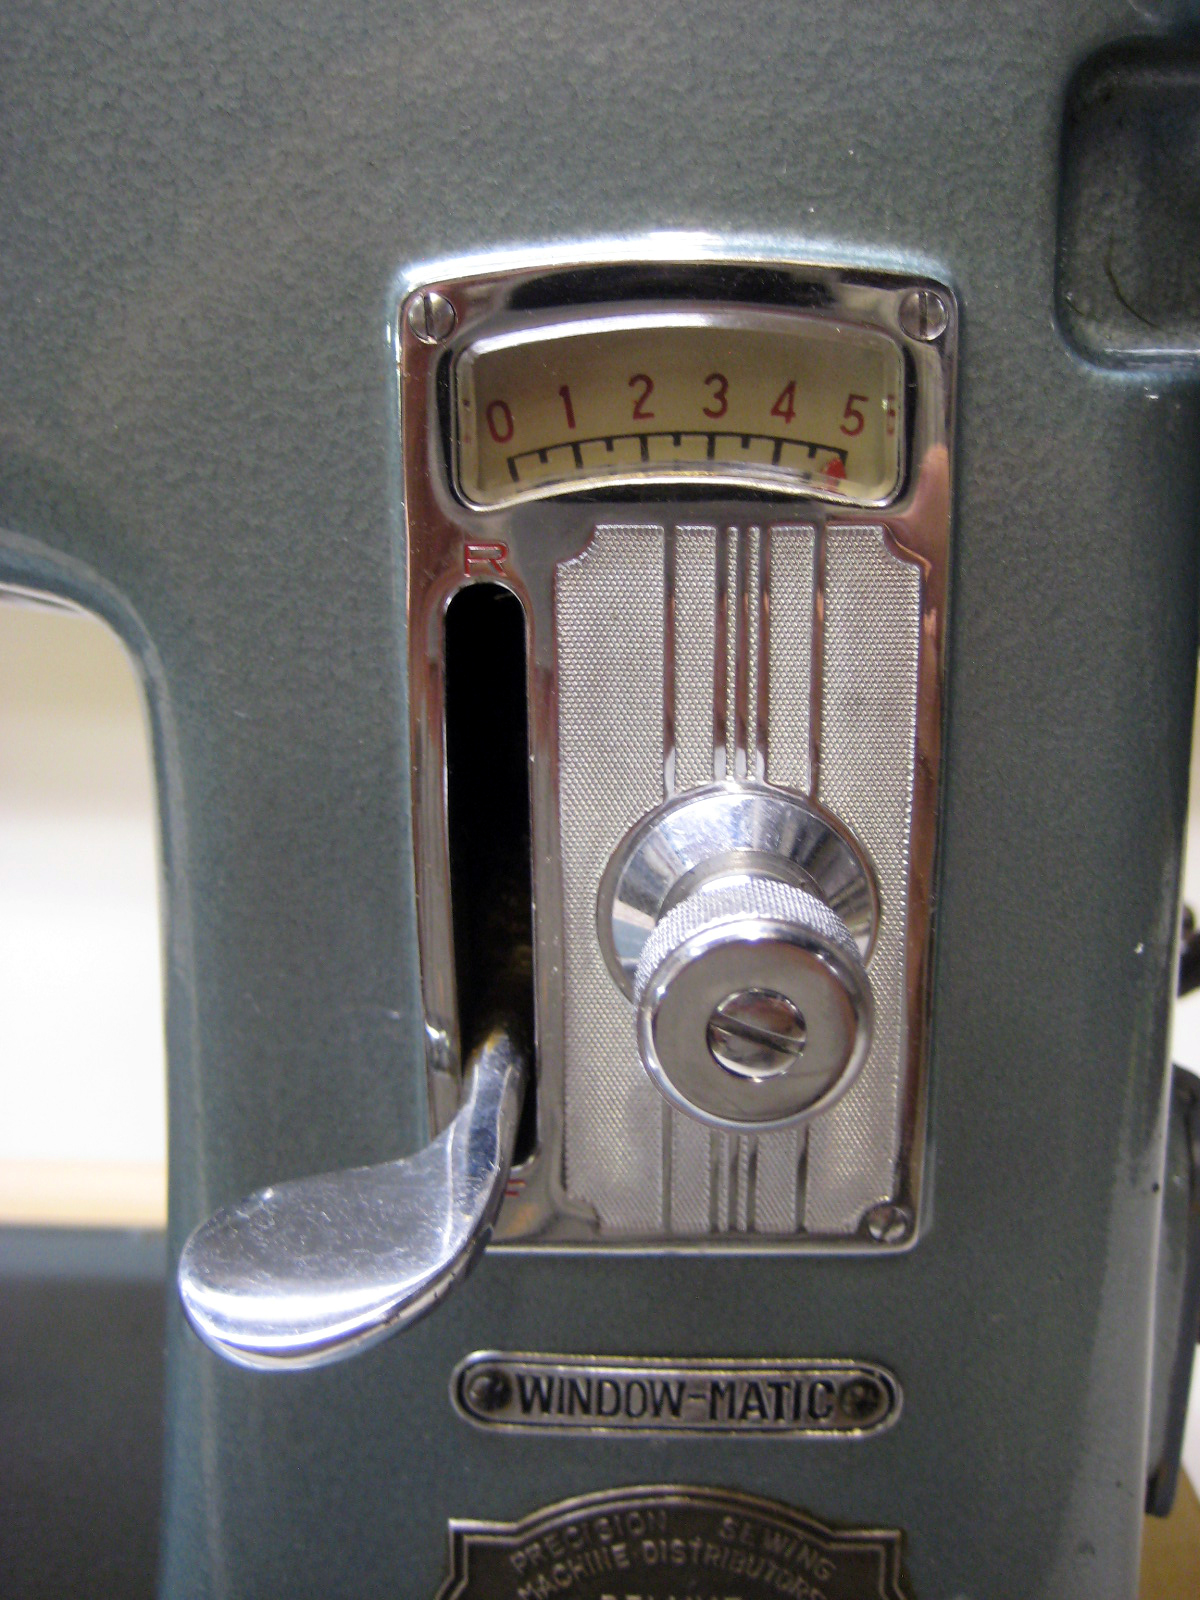
Reverse switch at the head
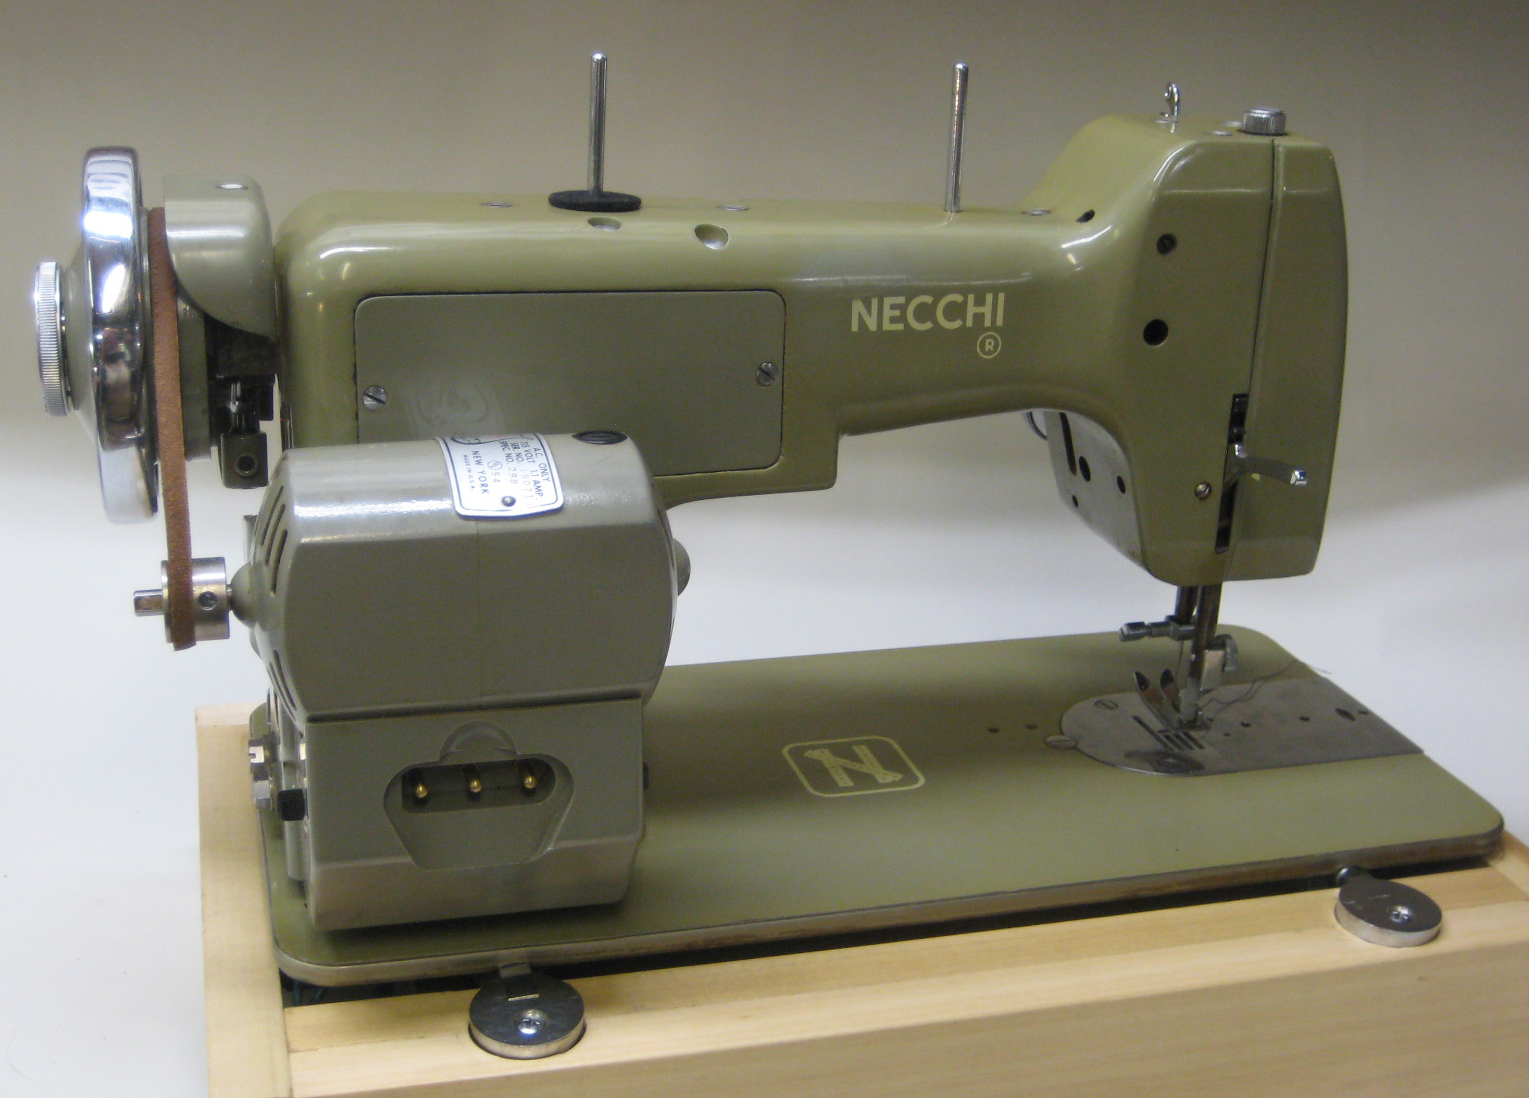
Very heavy... stop complaining about heavy; heavy is good!
The wall plug is extra long, the foot pedal has a winder feature on the bottom, nice
The foot pedal also has the needle up-down feature, just press with your heel and the needle goes down, press again and it goes back up.
 
Without any effort the basic controls are extremely easy, I used it for a little repair project and just love the sound, it is an oscillating hook but Bernina does it different than everyone else, seems hard to beat.


The small LCD screen may look a little lost on the front face but it's all you need

Look at this...
  • Needle left - right with two buttons close by
  • Needle up - down one button for that
  • Stitch width with two buttons for that
  • Stitch length two buttons for that
From a Human Factors standpoint it could hardly be easier; I spent a large part of my Advanced Vehicle Engineering career doing what's called Human Factors, the practice of how people interface with machines, sometimes refereed to as HMI or Human Machine Interface.

All in all there are a large number of nice options
Has a separate motor for the bobbin winder

Needle position left - right and ZZ are controlled by a separate servo for super accurate positioning

It came with nothing but the No.3 foot, manual, and a flat bed conversion


August 4, 2017

DIY Vintage Sewing Machine Base

Here is my tried and true method for vintage machine bases.

If you are not experienced with woodworking this will be hard to follow.

I'm and old Draftsman and this is how we work.

The result is not up to woodworking standards but is acceptable and easy.
It is a one hour project not including the three cotes of finish

Every machine is slightly different under the edge of the casting and this design method will likely require some chiseling or knifing of the edge where the casting interferes with the new base.

The handle holes are nice and should be put in before you assemble the parts.

At the lumber yard you'll need a 1 x 3 x 6 foot piece of Poplar (don't use better if you are inexperienced) and don't use Pine.

A 1 x 3 has actual dimensions of 3/4" x 2-1/2 or 0.75" x 2.5"... perfect for our job

The 2-1/2" should get every machine out there just high enough so that the casting feet are nicely clear of the table, (except for the Singers 101 and the 201, they need a full 3")

Draw this out on a piece of graph paper as shown
Assume you are going to triple check every dimension and go ahead and make a cardboard cut-out of the plan view to check the fit.

No amount of extra drafting, drawing, measuring, and thinking, will go to waste for this project, but you know this if you make patterns for sewing.

To Start:

  • Measure the length and width of your flat-bed

  • The inside of your wooden base is between 1/2" and 3/8" LESS THAN these two dimensions

  • On your drawing mark these two dimensions everything is based on these two dimensions

  • For the Front Piece you add 3/4 + 3/4 +  Inside Length

  • For the Back Piece the length IS the Inside Length

  • For the Sides you add 3/4 + Inside Width

  • The result is a minimum of end grain showing without getting into complex joinery

  • Glue and nail, screws are so big they will require wood plugs.
  • Check for squareness (measure across corners) if its not square tap, squeeze, or push till it is. If you don't it'll dry out of square and you will be very sorry. 

  • Bevel and sand all the edges and finish; I use three coats of Minwax water based Polycrylic, one to lift the grain and two to finish it. Sand 120 then 220, and 220 between coats. 


Yeah!

To mount the machine I use 4 dollops of clear silicone sealer so you can lift the machine either the by the head or by the base.


FYI the design changes if you have to lift the machine to change the bobbin like the Vigorelli

The only difference is to add a second Back Piece, lengthen the Sides 3/4" and (this is the hard part) locate and countersink the hinges from a cabinet. 


August 3, 2017

Capital Window-Matic (Brother 1950s)

The team at Brother way back then must have been quite something. Like any product manufacturing company on the rise they had a mission and by the 60s had become a premier maker of machines.

Finally we get some styling and the beginnings of some more considered HMI added to the machine. HMI is Human Machine Interface and in this case the super vague 15-91 style froward - reverse lever in replaced with the classic Brother window gauge.

Another outstanding 15-91 machine could sum it up because that is all it is. Manufacturing guys really like making what they made yesterday and so the incremental changes we see in the Japanese imports are minuscule and usually very well executed.

Another "all metal parts off" restore that went pretty smooth but the stamped, masked, and painted logo did not go into the SuperClean, the paint that is used in these masking operations is vary thin and comes off with a single dip into a high level cleaner. I use Pine-Sol and a tooth brush.

A close up of the window system, not easy at all to reassemble, don't do it if you are not competent in repairs. The dial does what you think; it moves the needle and changes the stitch length BUT it only pushes the 15-9 style lever up and cannot push it down (you'll see when you try it) again, its a very early attempt at improving the system.

I'll say here that "all metal parts off" restore is NOT for the newbie, you will end up with a pile of parts that a machine you can't use. If you have no experience with machine repair then I suggest you start out very slow and do not willy-nilly disassemble anything.

The reason that I do "all metal parts off" is because I really get annoyed at the little edge of oil grime between the metal parts and the painted casting; this is so difficult to get at that the only way is to remove parts, though you don't have to. Removal also makes the cleanup of those parts easy, the trade-off is the reassembly know-how and lots of time.


Universal Sewing Machine (1950s) Clone

Another 15-91 clone and a damn good one.

As you may have discovered some of us really like the "Clones Age" machines from Japan.

Its that free wheeling, noiseless, hand cranking that gets to you. And too the outstanding leather ability of these machines.

This one is in pretty happy shape, I traded it for a machine I was so tired of, and now I have an inexpensive machine to pass along to a newbie.
It was a complete "all metal parts off" restore, and again I take them off and drop them into a tall covered jar of SuperClean over night, remember any paint on these parts will come off so don't do this with your 1970s Singers. Most of the parts come out so clean that you just rinse them off dry them, (you need an air compressor) oil and reinstall.

The real time consumer is the tension disc, spring reset, and test sewing, plan on an hour.

So the whole process is usually about 4 hours.